 These next challenges come quicker than the last, which I doubt you'll be complaining about.
CHALLENGE 3-1


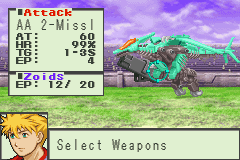
This is a fairly easy fight against Leviathe - use your Off-Ground Mines and Sandstorm to set up the shield and radar on the first two turns, then lay into her with the Sturm Claw and she won't last long.
You'll get "BC Set", for making a Redler Booster Cannon, as your prize.
CHALLENGE 3-2

 Classic Imperial vs. Republic brawl; one Zaber Fang and a Zaber Fang Old vs. a Shield Liger and a Shield Liger DCS (Dual Cannon System). This is also the first time you'll get to play with the Redistribution command, which lets you shuffle about the units you have in play - in this instance, we'll take the defensive route, moving the Shield Liger into the front top row and the DCS into the back bottom row, preventing them from being hit by B or V weapons.
 There's a lot of ways you can do this fight, and it's not a hard one to win - for example, you could move the DCS into the front row and use Sandstorm to win the day with your superior melee firepower, or do as recommended above, focus-fire on one Zoid, and whittle them down by using your shields to kite. Logistics Support can be used in this instance as well.Your prizes are two Zoidcore H1s and two ZNs (letting you make a Zaber Fang Old if you didn't choose to acquire one).
CHALLENGE 3-3

 Sure, that Iron Kong may LOOK imposing, but a simple look at your commands should tell you what to do - use Redistribution to move one Hammer Rock (preferably the center one) to the backrow, then follow with Logistics Support on your next turn and lay into the hulking ape. This has the advantage of keeping someone out of the way of it's monstrous physical attacks as well; you may even wish to move two back, but this gips you out of Logistics Support.Don't be afraid to use items if you need to, but keep smacking the Iron Kong and you'll eventually whittle it down. Be especially wary of your front rowed Hammer Rocks - the Kong WILL deal 125 damage or more per punch, making its lethal threshold very high indeed.
Your prize is another Zoidcore ZN, and "MS Unit" parts, for making an Iron Kong Maneuver type (the type Schwarz/Schubaltz used in Guardian Force).
CHALLENGE 3-4

 Not going to play pretend: this challenge sucks balls. The Hammerheads hit very hard, and your Redlers are quite fragile. Thankfully, you have the power to stop them dead - Water Mines will prevent the Hammerheads and your two Brachios (one of which is somehow not pictured) from doing anything, as well Off-Ground Mines (which backfires on your Redlers instead), and Sandstorm forces them to rely on their weaker physical attack for a turn. Avoid Muddy Ground - Redler evasion is your best bet - and drop Logistics Support at the earliest opportunity, preferably in the first round. You also have Redistribution, just in case, and False Nego from the last Challenge Mode - focus fire on one Hammerhead at a time and take things easy, don't be afraid to use your items, and you'll pull it off.
This was an extremely close fight - our forces were down to one Redler and two Brachios, all badly-damaged with no healing items, when we pulled out the win.
Your reward is the Water Mines deck command, which is Off-Ground Mines for water Zoids, and two Zoidcore WTs, for making Water Zoids.
CHALLENGE 3-5


This is an extremely weird fight, vs. the BLOX Zoids you've picked up with seemingly no rhyme or reason as to your own selected Zoids. Your people are also in very strange places, which you should fix with the Redistribution command as so:
 This fight is extremely strange. Tita, with her Gun Sniper Weasel, can take out any two units on a critical hit, and since Albane will go first with his Zabat, you should use its radar to boost everyone's HR and thus the chances of critting. It's better to aim for the back row, as it lets your other two focus fire on the Leoblaze and Mosaledge, which have thicker armor.Speaking of, your main is stuck in a hideously bad Barigator that doesn't even have multiple guns, so you're stuck relying on the Bite Fang and Good Grapple, but even then you likely won't deal much damage - fortunately, Zan's Laser Saber has no such issues.You also have two new deck commands, called "King's Way" - which lets your main wait to recover everyone else's HP to max - and "The Brave", which is a last resort that destroys the main's Zoid and resurrects all your other destroyed Zoids. You have Logistics Support, too, which you can either use to give the main a fighting chance, or avoid in favor of a full salvo both turns running.Luckily this one's as flexible as 3-2: my preferred method was to Redistribute the team to front-row everyone save the Barigator, focus-fire on the Nightwise for initiative superiority (later the Unenlagia to keep the enemy from having its choice of triple-digit damage with the Tail Rifle's 2-3S range), and drop Logistic Support next turn to clean house.Your reward for this is the LeoBlaze and Unenlagia data - more Zoid data you can only get by completing Challenge Mode.Well, given present circumstances...they don't exactly count against the four that you ABSOLUTELY MUST get via Challenge Mode, however...

No comments:
Post a Comment